Someday, the altered art you make today will be
old, faded, falling apart, and someone else will salvage the bits and use them
in new altered art.It's the best that any piece of art can hope for

~ anon~


Click on the tabs below for some other stuff

............................................................................................................

Showing posts with label PVA. Show all posts

Tuesday, 15 February 2011

In the teens…….

Only Eighteen Days to go to HugBinders – gulp its looming fast, so I thought I better get my A in G and get a prize made for the raffle – we have so many gorgeous prizes donated already it was a bit  daunting!
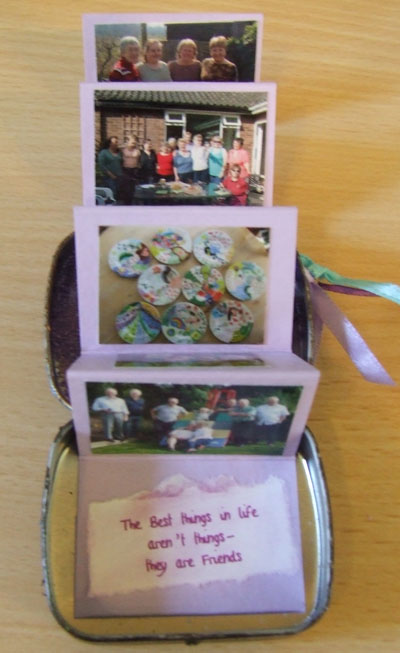
 Really had no idea what to do, so I just went to my secret stash of ‘stuff I will do something with one day’ closed my eyes and grabbed something – the first thing I laid my hands on was this fabby little box…..


Perfect!

Still no idea of what I was going to do with it, I grabbed some paint, rifled through another pile of secret stash of ‘things that can be used on projects involving the ‘stuff I will do something with one day’ stash’
As often happens my hand went towards my most favourite colour from the Eco Green range of paint - Green Patina.
Fancied  a play with some metal, which I haven't done for a while – tragedy I was nearly out of silver aluminium - how did that happen?? I hate running out of stuff! I did have enough to cover the sides of the box – so all was alright with the world.


Then as you can see I filled it with a bit of this and a bit of that and the end result is a bit of Nicks Tat (hey I'm a poet and didn't know it)


Right, off now to do the exciting things in life like get a new tyre for the car!

Thursday, 1 July 2010

Not exactly a Birthday card!

Don't know why but I do have trouble making cards these days, but I sat down on Tuesday to make a card for an interenet friend, and it turned out to be a little gift instead. She has just become a Grandma, and quite rightly, a very proud Grandma, and what Grandma, doesn't like to have a little brag from time to time?

So obviously if I couldn't make a card, I had to make her a Brag Book!

The cover is made from Grungepaper, so should stand up to a fair bit of handling and is painted with a multitude of different paints and inks and sprays, and then stamped with a flower stamp which came as a free gift on this months Craft Stamper mag.
The pages inside are blank, but I am sure she has a photo or two to put in there!


So that explains the mess on my craft desk yesterday and the reason for the diecut letters!

Sunday, 24 January 2010

Sunday Stamper, Squares and Journals....


This weeks challenge over on Hels Blog is 'Squares' - I have just bought myself a sewing machine and I have a stock of fabric paper which I made a while ago, one of which has you've guessed it Squares on it....

I was being  a very good girl and tidying my desk before I started another project and I came across this months Craft Stamper, which has a project in it for making a Journal by Kate Crane, so my effort for this weeks challenge has been heavily inspired by this.
As you can see I have managed to get my machine working and have done quite alot of stitching on this the cover to my Journal. I wanted to stitch metal and was pleased to find out it's very easy! Lots of ideas have been whirring round my head with metal and fabric.


The front and back covers will be joined together with LARGE Book Rings, but I couldn't get them in the scanner. I'm hoping for fill it this year with lots of different pages. When I am feeling creative but don't know what to do I can make a page!

Don't take too much notice of the 'Do Not Look Inside' message, I may share a few pages with you as and when I do them.. but maybe not everything!

Thanks Hels for making me think again on a Sunday!

Sunday, 10 January 2010

Done it.... I hope it meets approval!


Well I took the plunge and once I got started it was alot of fun. I had no idea where I was going when I started (and I am not actually sure where I finished up!) but I decided to go with the colour scheme of purple and gold so that would go in my newly decorated bedroom.. which is surprisingly enough, purple and gold.....

The frame, which was already highly decorative and needed no addition of embellishments apart from colour, was decorated with Viva paints, Alcohol inks,  Rub 'n' Buff, Metallic Rub Ons, Gold Krylon pen - you name it and it is there! - Oh forgot to mention a few blasts with some pink/purple/gold mica sprays.


The centre piece has one of my favourite PaperArtsy stamps (well all PA stamps are favourites!) which although I love I never quite know what to do with it. But I think it sits quite nicely here stamped on some gold metal and glued on top of some model magic (see post below) which I rolled out, trimmed into a rather organic shape with some decorative scissors and stamped into using a PA squiggly ink tree and a leaf texture mat. The pierced holes around the stamped house are there because I was going to try and stitch it to the clay base, but I quickly realised that it wasn't going to work. It may be because I didn't leave the clay to dry enough, but I didn't want it to dry completely.. so whether you can sew into it is still up for experimentation!

I painted it with Viva Bronze precious metal paint and Viva Bio colour black/gold.. which I have to say I am not at all impressed with, it doesn't to my mind give the illusion of black and gold, but looks OK, just doesn't do what it say on the tin!

Gold Croco Crackle paint behind the lot and voila!

I am happy with it, and it looks lucsious on my bedroom wall, it has just got to pass inspection from Teacher!

Saturday, 9 January 2010

Dare I or Daren't I???


Well there is nothing like a challenge to get your creative juices flowing. When KatherineT visited us at Christmas, she presented me and Sparkles with a goody bag. Inside the bag was a few packs of  Model Magic which is a lightweight air dry clay which can (apparently) be rolled really thinly and (apparently) stitched into but that is up for discussion LOL. I have had a bit of play with it, and I'll share that with you after KT has had her birthday pressie from me.

Anyway... also in the bag was a lovely frame made by KT herself, sure she could tell you much better how it was made but basically it is plastic mesh, which has been stitched (pulling some of the plastic strands together) mounted onto a canvas board and then covered with tissue/PVA and painted black.

I ooo'eed I arr'ed I exclaimed at how clever and gorgeous it was..... I planned where I was going to hang it and what image I would place in the centre... when those immortal words came from KT's direction.

"So it's over to you now to alter it, embellish it, paint it, decorate it"

Oh...... can't I leave it as it is??

"No No No" she says in a somewhat exasperated tone, " I have just done the hard bit, the easy bit is up to you!"

So thats my first (creative) challenge for 2010... there have been plenty of other 'challenges' but I come here on my blog to forget about them!

Gulp...... Bull by Horns time, I am off to have a play

PS you better keep an eye on Sparkle's Blog as well, cos she got one as well!


Monday, 15 June 2009

'Atishoo' Box and Out of my Box

This week on the AB book course I am doing was focussing on using magazine images, Well I have to be honest my heart sunk when I realised this , I just don't get them, no offence to anyone because people use them to great aplomb, but to me it still harks back to me cutting random pics out of my mums Woman's realm and sticking them in my scrapbook. I did consider for a nano-second of missing this weeks lesson, but that is not the point of doing a course AND my book is technique based so it must contain lots of different techniques. Well I tried, honest I did, but I still am not comfortable with it. But here is my page. The face made of many faces was done by using the packing tape transfer method.


The second part of the lesson was using frames, This was more 'me' I covered the page in PVA then placed some tissue over the top, which crinkled. Covered again with PVA, when dry I used alcohol inks (cos the PVA leaves a glossy surface the inks love it) The frame was made with twisted tissue paper. ..... So ok I am not happy with using mags but the leaves were cut out of a book.... mmmmm... bit contradictory of me I feel.....................

I have also had a bit of a play with some wooden blanks that we used at the last YCJ to alter. These will also be available soon to buy on our website http://www.yourcreativejourney.co.uk/ , so keep popping back to check, we have lots of different bits and pieces that will stimulate your creative juices!


I have used metal to cover these but being wooden and very well made almost any media can be used on them! Heidi has a very cool jewellry box on her blog!

Haven'y done any crafting this weekend as I just HAD to have a shopping trip with Mrs Bessie as I need a posh dress and Nicks and posh dresses are not usually seen together! So a trip to sunny kent was in order this weekend. As always I had the best weekend with the Sparkly pair, even though Mr s was forbidden from accompanying us on the shopping trip!
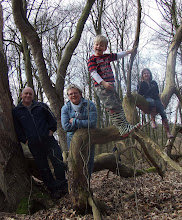
I have been given permission to use this photo cos even though he has his arm around another woman, the ring finger proves he is actually married LOL

Me and Mr Bessie


Mrs Bessie and Me......... all in a tree!