For this months Design Team Challenge, Lynn sent the whole team some 'Surfaces' to play with. Amongst other things I received a piece of Tea Dyed Calico and this inspired me to re-read Beryl Taylor's 'Mixed Media Explorations, a book I drool over but have never quite got round to exploring properly.
I have also yearned to make myself a wall hanging for a while now, so perfect opportunity!
Materials used
Hessian -
Distress Reinkers
(to buy any of the above, click on the link)
(to buy any of the above, click on the link)
Oddments of wool
Corrugated card from an old box
Stick as provided by my son after one of his adventures in the Woods
I added a bit more colour to the calico by 'tie-dying' it with a strong Tea solution, plus a few drops of Distress Ink, I liked the result but its a bit more subtle than I was hoping for (the best bit is hidden in the centre- duh!)
The main centre piece was made using Water-Soluble fabric - this stuff is SO much fun. In a nutshell, fibres and fabrics are sandwiched between two pieces of the WSF, I used organza, oddments of wool/fibres, gold thread. You can then machine stitch it to catch all the bits and pieces inside the sandwich and then lay it in some warm water and the WSF dissolves away , leaving you with a completely unique piece of 'fabric' I then used my soldering iron to burn away parts of the organza, making holes between the stitching.
I used Bondaweb to adhere the calico to the hessian, trying not to lose the creases! The Bondaweb didn't seem to like the square I made with WSF so I used a spray adhesive instead.
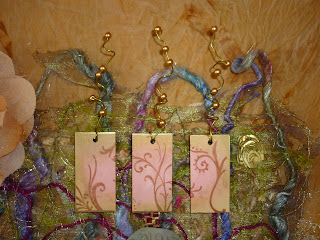
The beads were made from Shrink plastic, which you can see hanging from the Canvas panel, Stampboard bits and hanging from the side bits of wool.
I used Distress inks to colour the Canvas board, the centre piece was made from Angelina Film - I googled for instructions on how to use it and found loads of excellent hints and tips here.
I will have to admit to being a bit nervous of using the Stampboard but it is what they say, I lovely surface to stamp on!
The flowers were made from instructions as posted below (see Credit where Credit is due post) both made from oddments of calico one dyed with the Tea/reinker mixture and the other was sprayed with Cosmic Shimmers. The leaves were cut from some the offcuts of the Angelina film I used on the canvas board and some sequin waste bits.
The corrugated card was coloured with a swiping of Walnut Stain Distress Ink, and then I laid some more bits and pieces of Angelina Film straight on top, held it there with a wooden skewer and blasted with my heatgun, The pieces 'melted' to take the shape of the card, but did need gluing in place!
That's about it, Phew! if you have read this far I will be amazed and you need a medal!


Wow, this is just fantastic! I need to buy that book, I really admire Beryl Taylor's work, would love to take a class with her some day.... your piece is just stunning!
ReplyDeletewow stunning piece love all the different elements and how it comes together really fantastic
ReplyDeleteCor..that's amazing and turned out abeautiful piece...love the way you just get on with it..I'd have faffed over it for yonks.
ReplyDeleteThis is really beautiful Nicks, love what you have done... and not a feather in sight..... Annette x
ReplyDeletewow just gorgeous, would look wonderful hanging on my wall! just love it :) lol
ReplyDeleteglad to see it's up to the ususal high standard - it's gorgeous - I know a wall that it would look good on too! :-)
ReplyDeleteHow Beautiful xx
ReplyDeleteThis is fabulous Nicks, so much to look at on one piece. xx
ReplyDeleteWow it's gorjus dahlinks xx
ReplyDeleteOK i'm totally jelious of you right now.. your out there doing what i am only dreaming of.. i have the fabric.. i have a machine.. i just need the kick up the arse to try it all out lol
ReplyDeletefab fabric art.. well done you x
Oh Nicks my mouth just fell open when I saw this, it's AMAZING!!!! Have had that Beryl Taylor books for ages and often drool, you are a star just getting on and doing it! Thanks by the way also for the description and all the links!
ReplyDeleteBeautiful - love the sp beads! I drool over that book as well...
ReplyDeletehow stunningly gorgeous is that!!!
ReplyDeleteAmazing! I think I "need" that book!
ReplyDeleteShrink plastic beads - inspired, I'd never have thought of that.
Stunning, yes, gorgeous, yes, but that does not even come close to describe what you have created. This is such a special wall hanging. Love it. Lynne M x
ReplyDeleteAbsolutely stunning work x Hilda
ReplyDeleteAbsolutely gorgeous - really stunning. The colours, the design, the whole piece is a masterpiece. You should be REALLY proud of that!
ReplyDeleteDrop dead gorgeous and what a amazing list of techniques you combined too. Thanks for naming each one for us to check out. This blog is one of my favs.
ReplyDelete