Someday, the altered art you make today will be
old, faded, falling apart, and someone else will salvage the bits and use them
in new altered art.It's the best that any piece of art can hope for

~ anon~


Click on the tabs below for some other stuff

............................................................................................................

Showing posts with label Mixed Media. Show all posts

Tuesday, 15 February 2011

In the teens…….

Only Eighteen Days to go to HugBinders – gulp its looming fast, so I thought I better get my A in G and get a prize made for the raffle – we have so many gorgeous prizes donated already it was a bit  daunting!
 Really had no idea what to do, so I just went to my secret stash of ‘stuff I will do something with one day’ closed my eyes and grabbed something – the first thing I laid my hands on was this fabby little box…..


Perfect!

Still no idea of what I was going to do with it, I grabbed some paint, rifled through another pile of secret stash of ‘things that can be used on projects involving the ‘stuff I will do something with one day’ stash’
As often happens my hand went towards my most favourite colour from the Eco Green range of paint - Green Patina.
Fancied  a play with some metal, which I haven't done for a while – tragedy I was nearly out of silver aluminium - how did that happen?? I hate running out of stuff! I did have enough to cover the sides of the box – so all was alright with the world.


Then as you can see I filled it with a bit of this and a bit of that and the end result is a bit of Nicks Tat (hey I'm a poet and didn't know it)


Right, off now to do the exciting things in life like get a new tyre for the car!

Tuesday, 26 October 2010

I'm late I'm late for a very important date.....

I started this project ages awhile ago, and then life took over and I never managed to get it finished in time for its original purpose of entering it into the Craft Stamper Competition, but whilst attempting a tidy up in the craft room today I decided to finish it off so thought I would share it with you anyway. Hey whilst writing this I have realised the background is green, so I can enter it into Hels' Sunday Stamper Challenge, so all is not lost!

As you can see it is an altered book. I love to see books that are a bit worse for wear because they have been read, and re-read and well loved. I don't think this readers digest book had actually ever been read, but it now looks like it has!
I cut a hole in the pages to accommodate a 'house clock' and each chipboard tile has been coloured with distress inks, stamped and then triple embossed with clear UTEE. Its a busy book, with well thumbed pages, and I like to think as the title suggests it has been read 'Time and Time Again'

The cover is a bit rough and ready - I didn't want it to be perfect as it was supposed to be well handled and maybe even shoved in a bag everyday to be read on the train to work or as in my OH's case, shoved done the side of the loo - I never understand the attraction of reading on the toilet, think its a man thing!  - The cover is made from Grungepaper - grungepaper/board doesn't really care for heat embossing, but in this project that was perfect because it curled the edges somewhat - It does however like being stamped on - take a look at this gorgeous stamps I bought from The Artistic Stamper - great aren't they!! I didn't know quite what I would use them for when I bought them, but knew I had to have them .... hey presto they are just perfect for this project! They are quite detailed and I was really impressed how well they stamped onto GP.


Perhaps I better start on an entry for the CS now for 2011, then I may get it done in time!!

Oh just noticed my clock is a bit wonky in the photo - that will be because I havent fixed it in properly yet, it will be straight once i find my magnetic strip to keep it in place but easily removable for battery changes etc, so please pretend you didnt notice that LOL

Saturday, 4 September 2010

Well it certainly took some hammering!

As the main focus of the penultimate Altered Element DT Project, Lynne sent me an Eco Green Crafts Board Book to play with. A simple project I thought, but this has undergone several changes and has withstood the battering very well!

First of all I painted it with my favourite Eco paints and sponged on some Brusho mists, Lynne also sent and stamped it with the Artemio stamps I received as part of a pack a month or two ago. It looked ok I thought, but then I went away on holiday but when I returned and found a few minutes in between washing sleeping bags I realised I didn't like it at all.
As it had had a coating of acrylic paint it would readily take some alcohol inks, they went on very well and the result was pleasing but it didn't please me enough, so I used some alcohol to remove them.
This did no harm at all to the book, just harmed my mojo a bit as I was at a bit of a loss as what to do with it, so left it for another couple of days.
Now this is an interesting subject, I wonder what your views are? The finished article is to be a small token present for a special friend of mine, just to say thank you and that I luvs her. Now here's the question, when you make something for someone do you think you should make it to suit their taste and style or do you make something in your own style but is straight from your heart? This is so far removed from what this person would choose to have in their house but I am hoping they will love the fact that it is part of their friend Nicks. I'll tell you when they have received it.. but they will say they love it anyway so that's no test is it!!?? tell you what I will pay a surprise visit and check which drawer they have shoved it in LOL

Anyway back to the plot, as you can see it has now been painted, inked and sprayed for a 3rd time. It has been blasted with a heat gun on several occasion's and suffered no ill effects at all. That just goes to prove recycled stuff can be of the highest quality!
I painted the book with shades of gourde, orange and sunflower eco paints and then blended some Barn Door distress ink around the edges.
I edged it with some torn double sided tape which I gilded with Crafty Notions Gilding flakes I also gilded the edges of the pages inside.

Regulars to my blog will know I love my chooks (and the recipient is a bit fond of my girls as well - damm too much info I bet she will guess now) so I just had to buy this paperartsy stamp and use as the main focus of the cover, I love the way her legs dangle off the end and her wing goes the edge, I don't 'do' straight edges very well! Her body is made from some metal I embossed and her legs are made using Lin and Leandra's clever tape sandwich technique, but in this case its a more of a triple decker sandwich as it has metal on both sides. The same gold metal was used to cover the top and flap of the book, but has been coloured slightly with acrylic paint and sprayed with cosmic shimmer. I have bought some really cute chicken stamps from T.A.E and will use these inside
Lynne also sent three shades of the new Brusho Mist Spray's  these are a joy to use and I used them to colour some watercolour paper which will act as the backing papers fo the pages inside (which i cant show you until the recipient has received it!)
I also sprayed these onto a small piece of card onto which I did a touch of journaling and put behind a microscope slide.


I think thats about it apart from a few other bits and pieces I added from my stash including the cutest chicken button I received in the post today from my fellow fowl lover Kathy -thanks Kathy - very oppurtune, you are a brave person if you read this far..... sorry bit of an epic post!

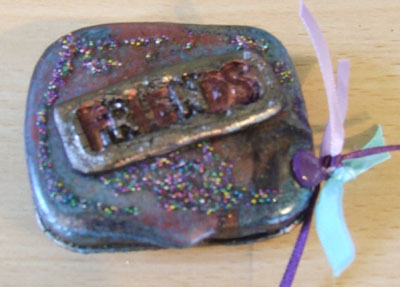
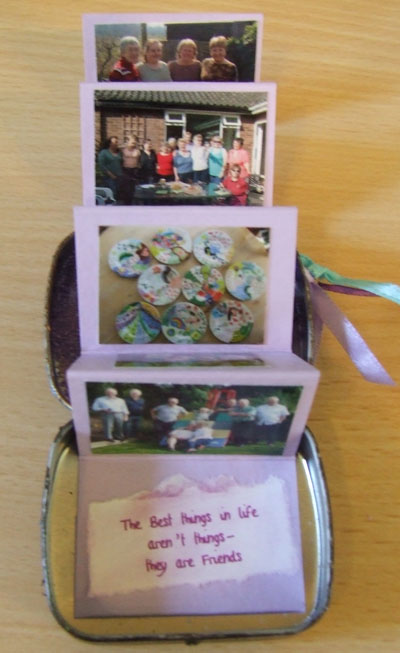
Remember to treasure your friends because

and


Now off to tidy up, if you saw the state of my desk you would faint with horror!

PS................
The Altered Element will soon be calling for a new Design Team, if you are interested keep an eye on their blog. I have really enjoyed my time with them, why dont you give it a go?
http://alteredelement.blogspot.com/

Wednesday, 14 July 2010

WOYWW..... I'm a solderin' and a sewin'


Now then People, you have got to admit that (for me) this looks almost organised... I did have to clear some space to actually get the machine on my desk (and I have to admit, I did have to clear some floor space to get to the desk) but I didn't do the - push it all back method - I put it away!
My textile mentor Katherine made me two beautiful canvases for my Birthday (which she has now blogged) and she also gave me a free stitching foot (is that what you call them?) for my machine, a very opportune gift because I had a piece of Tyvek from last months DT pack,, which I had already, painted and ironed to distort it, and had the idea of trying to stitch around the 'bubbles'  - I can still hear the Dragon of a woman, my Needlework Teacher at school, voice ringing in my ear 'Nicola try it on a piece of scrap fabric first'  well I didn't pay any attention to the woman then, and I am not paying any attention to her now, I just went in head first and stitched straight onto my precious piece of Tyvek, luckily I am really pleased with the result.
Swinging to the right, you will see I have my box of soldering supplies out, that's because I burnt the edges of the Tyvek to roughen them up a bit, I thought it was a much safer bet than using a heat gun on it, and I was right, it worked really well, so I added a couple of extra holes as well. You can also see the Morsbags I have been making and are ready to be sent off on Friday after I have drawn the blog candy draw... take a look at the post a few down and add you name if you would like to be in with a chance of winning one.


Now onto the exciting part...
This months DT pack has arrived.......
lots of scrummy stuff to play with, Watch this space!

Thursday, 1 July 2010

Not exactly a Birthday card!

Don't know why but I do have trouble making cards these days, but I sat down on Tuesday to make a card for an interenet friend, and it turned out to be a little gift instead. She has just become a Grandma, and quite rightly, a very proud Grandma, and what Grandma, doesn't like to have a little brag from time to time?

So obviously if I couldn't make a card, I had to make her a Brag Book!

The cover is made from Grungepaper, so should stand up to a fair bit of handling and is painted with a multitude of different paints and inks and sprays, and then stamped with a flower stamp which came as a free gift on this months Craft Stamper mag.
The pages inside are blank, but I am sure she has a photo or two to put in there!


So that explains the mess on my craft desk yesterday and the reason for the diecut letters!

Monday, 31 May 2010

Hen Art??


OK OK so I may be getting a bit obsessed by my Chickens - so much so that I have made a canvas to mark their new found freedom, it didn't quite start out that way though!


Lynn from The Altered Element sent me some Crafty Notion Spraypaques this month along with some Puff Paint, I have already used some of the paint on the Cup/Saucer below, but this time used them along with the Puff paint on this canvas


The Puff Paint is great fun to use, you smear it on - well I do - sure the more refined amongst you may use a spatula or something, but whilst I have fingers I can think of no better tool to use (at least I dont lose them!) - and then dry it with your heatgun and it expands into.... - well a puffy shape - cool eh?
I then sprayed/painted mine with the Spraypaque and cosmic shimmers along with acrylic paint. You can also stitch into it, I haven't tried that yet but intend to on a future project.


Hels Sunday Stamper Challenge this week was 'Wings' and as I haven't played along with Hels for a few weeks I thought it was a good starting point for my project - you see I like Angels (hold that thought) and I am reading 'Who's your Dada' by Linda and Opie O'Brien - which is the book for my personal monthly challenge for June (for future reference hold the thought that I don't like dolls ) but I do like Gargoyles and Angels - so this was supposed to be a Gargoyle Angel.

I had this wooden Gothic Arch - which goes well with Gargoyles -
I didn't have any Grungeboard wings left so I cut my own Angel Wings out freehand

Assembled Head/Arch/Keys for legs (I like that bit LOL) and then wings............... ummmmm the wings looked more Birdie than Angelie.. so The Chicken Theme came about and I made a metal chicken's head, in true Upcycling I used an empty tomato puree tube purely because it is such a lovely colour!

OK OK so my thought processes do take a few twist and turns along the way but that's OK, projects may not turn out as I initially imagined them, but that means they don't turn out 'wrong' !


So that's my project for this weekend!


Hope it made you smile just a little bit, my chooks make me smile and I hope they are enjoying their new found freedom, but whilst we are on the subject just take a look at the picture below and see the conditions they were living in, I hope it makes people think twice before buying eggs from Battery Hens!


Monday, 8 March 2010

Chuffed and Excited! The 'Altered Element' of my Life

Regular readers of my Blog will know that I always like to mention online shops that offer great value and great service, and one that I have always received fantastic service from is The Altered Element. Lynne not only sells the most luscious 'stuff' that is right up my street but  has always been most helpful in sourcing and ordering products for me and delivering super quick - all you crafters out there will know that if you want something you want it NOW! Well 'now' is a bit of a tall order for any company, but I am happy with ASAP and ASAP is just what Lynne does!

Well because of the passion Lynne has for Mixed media/Altered Art/Textiles I am so excited at being chosen to be on her new Design Team as a Designer and am really looking forward to working with her and the team in the next few months.

I hope you will keep an eye on her Shop Website and Altered Element Blog to see what we are getting up to!

Thank you Lynne for sharing this oppourtunity with me!

Wednesday, 24 February 2010

Two Out of Three Aint Bad

but can I make it 3/3.... or can I kill 3 birds with one stone??

1. My Dads 80th Birthday 'card'
 2. Hels Sunday Stamper challenge is Men ..... and this is for a Man and she can only be hugely impressed that I actually did some stamping on this one.
3. Tuesday Taggers challenge this week was to get Messy.... and messy I got in true Sir Tim Style

So pretty please can this cover all three??

Here is the cover, metal work of course and I am so loving my new metal alphabet punches that I used for the wording on the cover.

I would love to lay claim for the paper used on the back cover, but it is some luscious handmade paper I bought from my recent trip to The Craft Barn. I must love my Dad to use such precious stash


Here is the Star Card/book opened out, it's very trick to photograph, but basically its bound together with I think its called Japanese Stab Stitch ?? I may be wrong
so that's the Men bit and my Dads Birthday taken care of
now for the Tuesday Taggers messy bit

Think I have managed that bit as well don't you??


Sunday, 24 January 2010

Sunday Stamper, Squares and Journals....


This weeks challenge over on Hels Blog is 'Squares' - I have just bought myself a sewing machine and I have a stock of fabric paper which I made a while ago, one of which has you've guessed it Squares on it....

I was being  a very good girl and tidying my desk before I started another project and I came across this months Craft Stamper, which has a project in it for making a Journal by Kate Crane, so my effort for this weeks challenge has been heavily inspired by this.
As you can see I have managed to get my machine working and have done quite alot of stitching on this the cover to my Journal. I wanted to stitch metal and was pleased to find out it's very easy! Lots of ideas have been whirring round my head with metal and fabric.


The front and back covers will be joined together with LARGE Book Rings, but I couldn't get them in the scanner. I'm hoping for fill it this year with lots of different pages. When I am feeling creative but don't know what to do I can make a page!

Don't take too much notice of the 'Do Not Look Inside' message, I may share a few pages with you as and when I do them.. but maybe not everything!

Thanks Hels for making me think again on a Sunday!

Wednesday, 20 January 2010

Not a Domino in sight (or Triomino!)

I am known for changing my mind, and I know only this morning I was planning to alter some Triomino pieces for an Altered Game Piece swap... but that was because
a) we weren't allowed to alter domino's - why? cos that's what Trish the Host said, and if you host a swap then you make the rules
b) because I couldn't find the Da Vinci games pieces that I really wanted to use.
but then, I found the Da Vinci bits I really wanted to use

Da Vinci Game pieces? Ever heard of them? Nope didn't think you had! A few years ago during the height of The Dan Brown 'Da Vinci Code' mania, I found a game of the same name in a bargain bucket and purchased it as a stocking filler for D.H.  Well we soon found out why it was it the bargain bucket, it's probably the most boring game in the whole wide gaming world and actually 'bargain' could be stretching a point, unless of course they fall into the hands of someone who rather likes altering things and sees them as (potentially) very cute little 'shrines'


As always I had - not a clue - what I was going to do with them when I managed to grab a bit of me time tonight, but I came across these three lovely - albeit bloomin miserable looking - ladies who fitted beautifully inside the pieces.
I randomly tore a page out of an old book I use for text pages and challenged my self to find some apt text to make a mini collage inside each one. Each one as had a few layers of UTEE which gives the glassy look
All three ladies are I am sure unrecognised Angels, even if they do look like three miserable old buggers, so they all have stamped and embossed wings.
Off to have a think about another challenge - take a look over at Gingersnap Creations - Metallics... yum!
Thanks for stopping by and leaving comments, I really do appreciate it xxx


Friday, 15 January 2010

All Present, Delivered and Correct....


Well maybe not correct, but pressie has been delivered to Katherine T.
Another altered box, which was just a plain pine jewellery box to begin with.
Katherine gave me some model magic so I wanted to have a play with that, and it ended up on her birthday present.
I rolled it very thinly, stamped into it and folded it, tweaked it, painted it.
This sits on a layer of painted and heated Tyvek.
I made a mould of a Gargoyle fridge magnet and used the model magic in that... its a very details and in parts undercut mould, and it came out much better than the ones I have tried to make with oven baked polymer clays.


Inside there is a removable tray. There is a working clock inside one of the compartments, the face of the clock is embossed metal, which i just doodled on. The bottom of the other compartments are filled with UTEE, coloured with Mica powders.

The lower tray has been lined with metal from Tomato Puree tubes... I love the colour of these and usually flatten them in my Wizard, but have left them creased here and covered them with clear UTEE and a few micro beads.
I have just noticed that some of these photos were taken whist the outside was matt black.. I have since sprayed it with a green mica spray.  The sides are metal, wire, beads, embossing powder and some fab felt like stuff that you can heat and it melts... oh I am so sad getting excited about such stuff!

Monday, 11 January 2010

Frivolous Feet


I fancied having a go at a blog challenge so had a look yesterday at Ink on my Fingers Sunday Stampers.
This week the challenge was entitled 'Tiger Feet' and being a Mud fan in my day I just had to have a go.

Luckily you didn't have to include the Tiger bit just the feet bit.!! Now... I am not over-run with feet stamps, but I did come across these lovely Stockinged Legs that I bought from Dimension Forth ages ago and never quite had a reason to use them. So I am hoping Hels will allow these stockinged feet!??
(If you click on the photo, you will see there are various references to feet)


Now to me Feet means travelling, and if you have had a look at my blog before you may remember 'Auntie Gertie' - I have been thinking about her since I found the stamp which reminded me so much of her and have wondered what her life was really like, she died before we could have a 'proper' adult conversation.
I wonder if that spinster lady who looked after her parents until they died and as far as I can remember hardly ever left her home town, never mind her home county, had a secret desire to (or in fact actually did) wear frivolous /daring underwear and dreamt of taking off and travelling the world.

We will never know, but if she did then this collaged mirror is a tribute to her secret desires.

Sunday, 10 January 2010

Done it.... I hope it meets approval!


Well I took the plunge and once I got started it was alot of fun. I had no idea where I was going when I started (and I am not actually sure where I finished up!) but I decided to go with the colour scheme of purple and gold so that would go in my newly decorated bedroom.. which is surprisingly enough, purple and gold.....

The frame, which was already highly decorative and needed no addition of embellishments apart from colour, was decorated with Viva paints, Alcohol inks,  Rub 'n' Buff, Metallic Rub Ons, Gold Krylon pen - you name it and it is there! - Oh forgot to mention a few blasts with some pink/purple/gold mica sprays.


The centre piece has one of my favourite PaperArtsy stamps (well all PA stamps are favourites!) which although I love I never quite know what to do with it. But I think it sits quite nicely here stamped on some gold metal and glued on top of some model magic (see post below) which I rolled out, trimmed into a rather organic shape with some decorative scissors and stamped into using a PA squiggly ink tree and a leaf texture mat. The pierced holes around the stamped house are there because I was going to try and stitch it to the clay base, but I quickly realised that it wasn't going to work. It may be because I didn't leave the clay to dry enough, but I didn't want it to dry completely.. so whether you can sew into it is still up for experimentation!

I painted it with Viva Bronze precious metal paint and Viva Bio colour black/gold.. which I have to say I am not at all impressed with, it doesn't to my mind give the illusion of black and gold, but looks OK, just doesn't do what it say on the tin!

Gold Croco Crackle paint behind the lot and voila!

I am happy with it, and it looks lucsious on my bedroom wall, it has just got to pass inspection from Teacher!