
Thank you to the many people who commented/emailed me about my Wall Hanging I recently made as an Altered Element DT project, using water-soluble fabric. Because of the very positive response Lynn asked if I would do a Tutorial and here it is!
Water Soluble Fabric (WSF) is a fantastic medium, that I first came across at the Upcycling Class I attended with Meg Foster, who is not only a fantastic artist, but a genius with textiles. It is primarily used for machine embroidery, but in this instance I am using it to make my own bespoke fabric/textile collage element. I am hopeless with a needle, but can thread a sewing machine, not too hot on straight lines though, which is fine as this is all very freestyle but you can be much neater if you wish!
There are various different types of WSF, some use cold water, some warm, some hot, but the result is the same, the WSF dissolves in water, leaving behind your work of art - its like magic!
I use Gutterman Ultra Solvy which is very strong and stable until it comes into contact with water, so make sure your working area and hands are dry!.
Firstly collect together some odds and ends of fabric, threads, wool.. whatever you fancy. I like to use fine organza along with heavier textiles

Ultra Solvy looks and feels thick a fairly thick cellophane. Cut a piece which is slightly larger than double the size than you wish your finished piece to be. My piece is about 10x20 and is pictured folded in half

I want this finished piece to embellish a blank canvas bag, so I have cut a piece of my chosen base fabric to fit the size of the bag

Lay the fabric on one half of your WSF, and begin by adding extra elements. I have torn strips of organza and laid them on the base in a criss cross fashion

Then added various fibres in a very random fashion, by just 'dribbling' them over my project, you can be alot more uniformed if you wish.

I die cut some hearts (Sir Tim's new Sissex die) and laid them on top of the fibres

When you are happy with the placement of your bits and pieces, fold the top half of the WSF over to make a 'sandwich' To hold it together whilst you are sewing it, I have used dressmaking pins. You can also give the WSF a light spray with some temporary spray adhesive, but its rather pricey and I don't have any! But Pins work, you just have to be a bit careful!

Thread your machine with either a contrasting or matching thread, depending on the look you want. I'm not an expert with embroidery stitches on sewing machines and my machine is very basic, but you must ensure that you use a stitch that is completely interlinking such as straight stitch or zigzag. The idea is now to capture all the threads/motifs etc with stitching. You can either be very random about this or uniformed - as you can tell I like to be a bit random! - Its not looking too promising at the moment, but don't be disheartened!

Now for the magic, soak your finished piece in hand hot water until all the WSF has dissolved away and then give it a good rinse.

and as if by magic your beautiful piece of fabric emerges! Sandwich it in a towel and press to remove excess water, then leave it to dry flat.

Its beautiful on its own, but it has so many possible uses, its up to you and your imagination!
I added a few beads and used mine on a plain canvas bag
which I gave a quick spritz with some cosmic shimmers.

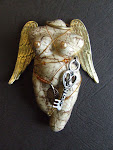
As it is going to be a present for a crafty friend of mine, I made a charm to hang from the handle. It is made from UTEE poured into a face mould and a silicone chocolate mould, with grungeboard wings and crown, and a small tag made from Shrink plastic, which says 'Art is not a thing it is a way' - How true!

So off you go and have a go and please link back to my blog and let me know when you have created a work of art so I can have a nosey! Any questions, please feel free to email me!


What a fabulous tutorial, nice and straightforward with a gorgeous finished piece.
ReplyDeleteAnd I'm in love with your wall tiles!
I am sure I left a comment on her! lol
ReplyDeleteGreat tutorial Nicks - even I could follow it! But I can't sew and don't have a machine - wonder if I could persuade my big sister to teach me to use hers???
Linkon x
oops, that should have said "on here" lol
ReplyDeleteLinkon
oh dear Linkon can't spell lol
ReplyDeleteLove this but I don't have crafty stuff up here in Scotland - OR a sewing machine !!
Love it though. Colours are so different for you
Sparkles x
Wow that is just gorgeous your clever girly. I have never heard of this stuff, but going to have to look out for it now! Hope the chooks are ok in this heat. x
ReplyDeleteabsolutely think this stuff is awesome...thanks...xxx
ReplyDeleteWow, really great tutorial, will have to try this, it is magic!
ReplyDeleteWhat a fantastic tutorial this is. Lynne M
ReplyDeleteWho a clever girl then, great tut and interesting finished artical.. think this will be the next thing on my wish list lol
ReplyDeleteYou make it sound so easy - I'm definitely inspired to have a go at this.
ReplyDeleteI have a pack of this stuff - thanks for the inspiration - must go and use it very SOON!!!!
ReplyDeleteIt looks far better here than it does there LOL thanks Matey its cool and arty I love it .
ReplyDeletewill have to have a play later when I am not so busy My SIL does all this stuff and you would love some of her work will have to get her to set up a blog
Brilliant tutorial, I've long wanted to know how you use water soluble fabric. I'll try it when I can get my hands on a sewing machine!! x
ReplyDelete